Introduction to Django REST API
We know that Django provides different types of features to the user; the rest API is one of the features that Django provides. It is usually a compelling framework to build the web-based API per our requirements. It also provides flexibility for implementation. Mainly it offers different types of authentication features to the developer, such as OAuth 1 and OAuth 2. Django also supports serialization, so developers can work with ORM and non-ORM data. When we talk about support, it provides good community support to the user.
A REST API is a famous way for frameworks to uncover valuable capacities and information. REST, which represents illustrative state move, can consist of at least one asset that can be gotten to at a given URL and returned in different configurations, such as JSON, pictures, HTML, and the sky’s the limit from there. In other words, we can say that REST (Representational State Transfer) is standard engineering for building and speaking with web administrations.
It commonly commands assets on the web that are addressed in a text design (like JSON, HTML, or XML) and can be gotten to or changed by a foreordained arrangement of tasks. Considering that we commonly construct REST APIs to use with HTTP rather than different conventions, these activities compare to HTTP techniques like GET, POST, or PUT. As the name proposes, an API (Application Programming Interface) is a connection point that characterizes the cooperation between various programming parts. Web APIs characterize what solicitations can be made to a part (for instance, an endpoint to get a rundown of shopping basket things), how to make them (for instance, a GET demand), and their normal reactions.
How to Create Django REST API?
Let’s see how we can create a REST API in Django as follows:
First, we need to follow some steps to create the REST API as follows:
In the first step, we need to add the framework.
Then, to initialize the framework into the specified project, we need to open setting.py and add rest_framework as below.
Code:
INSTALLED_APPS = [
  'django.contrib.admin',
  'django.contrib.auth',
  'django.contrib.contenttypes',
  'django.contrib.sessions',
  'django.contrib.messages',
  'django.contrib.staticfiles',
  'rest_framework',
]
Now in, next, we need to create an application and model as per our requirement, so To create an application, we can use the following command.
Code:
python manage.py startapp sampleproject
Explanation:
- In the above command, we can see that the sampleproject folder will be registered; after that, we need to add the INSTALLED_APPS and our specified URLs. After executing this command, we can see the changes inside the setting.py file.
Code:
INSTALLED_APPS = [
  'django.contrib.admin',
  'django.contrib.auth',
  'django.contrib.contenttypes',
  'django.contrib.sessions',
  'django.contrib.messages',
  'django.contrib.staticfiles',
  'rest_framework',
  ' sampleproject ',
]
Now we need to add whatever url we have inside the url file as follows.
Code:
from django.contrib import admin
from django.urls import path, include
  urls= [
   path('admin/', admin.site.urls),
   path('', include("sampleproject.urls"))
]
Explanation:
- In the above code, we can see; that first, we need to import all the required libraries; after that, we need to add the URL pattern with the specified url.
- In the third step, we need to create the model; here, we will create a student model inside the model file.
Code:
from django.db import models
class StudentModel(models.Model):
  studname = models.CharField(max_length = 50)
  description = models.TextField()
def __str__(self):
  return self.studname
Explanation:
- In the above, we created StudentModel as shown; inside the model, we have a studname variable with a specified maximum size.
Now our application is ready for execution, and the time to create a serializer is as follows.
Serializers permit complex information, such as query and model occurrences, to be changed entirely to local Python data types that can be effortlessly delivered into JSON, XML, or other substance types. Serializers likewise give deserialization, permitting parsed information to be changed over once more into complex kinds after approving the approaching information, so add the following code inside the serializer file.
Code:
from rest_framework import serializers
from .models import StudentModel
class studentSer(serializers.HyperlinkedModelSerializer):
   class Meta:
     model = StudentModel
     fields = ('studname', 'class')
Explanation:
- In the above code, first, we import the rest_framework and already created model as shown; after creating the serializer model and inside the model, we define fields as shown.
Now we need to create the view to render the data with the frontend, and it can handle user requests. So inside the view file, we need to add the following code.
Code:
from rest_framework import view
from .serializers import StudentSer
from .models import StudentModel
Class studenview(view.ModelView)
Query = StudentModel.object.all()
Ser_class = StudentSer
Explanation:
- In the above code, we import all the required libraries; after that, we create a view to render the data as shown.
The last step is to define the URL for our specified API.
Code:
from django.urls import include, path
from rest_framework import routers
from .views import *
r = routers.DefaultRouter()
r.regi(r'student', StudentView)
or rest_framework
urlpatterns = [
  path('', include(r.urls)),
  path('api-auth/', include('rest_framework.urls'))
Explanation:
- Now we need to run the server and check the API.
- Now run in the local server; after execution, we can see the result in the screenshot below.
Output:
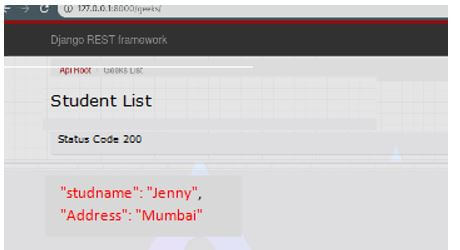
Django REST Framework
- In the above point, we have already discussed how we can create an API with the Django framework. The Django REST Framework (DRF) is a bundle based on top of Django to make web APIs. One of the most momentous highlights of Django is its Object Relational Mapper (ORM), which works with connection with the data set in a Pythonic way.
- You can make exemplary web applications using Django and open their usefulness to the world through REST APIs. This is quite simple to do, as a matter of fact! However, the Django REST Framework is more specific for this undertaking, is based on top of plain Django, and simplifies the cycle.
APIView Class
APIView classes are not the same as ordinary View classes in the accompanying ways:
- Demands passed to the controller strategies will be REST structure’s Request occurrences, not Django’s HttpRequest occasions.
- Overseer strategies might return the REST system’s Response rather than Django’s HttpResponse. The view will oversee content discussion and setting the right renderer on the reaction.
- Any APIException special cases will be gotten and intervened into suitable reactions.
- Approaching solicitations will be confirmed, and suitable consent and choke checks will be run before dispatching the solicitation to the controller technique.
Conclusion
With the help of the above article, we saw the Django rest API. From this article, we saw basic things about the Django rest API and the features and examples of the Django rest API, and how we use it in the Django rest API.
Introduction to Django Authentication
We know that Django has different features; authentication is one of the features that Django provides. Typically Django itself handles the authentication and authorization at the system level. Authentication means verification of the user, or we can claim for a specific service; on the other hand, we have approval means we determine this authenticated user or not, or we can say that we can provide specific service access to the requested user. One more important thing is that authentication is used for both terms, such as authentication and authorization.

What is Django Authentication?
Django authentication is a client validation framework. It handles authentication, gatherings, authorizations, and treat-based client meetings. This documentation segment explains how the default execution figures out of the crate and how to stretch out and alter it to suit your venture’s necessities.
The Django verification framework handles both validation and approval. Momentarily, validation confirms that a client is who they guarantee to be, and approval determines what a verified client is permitted to do. Here the term verification is utilized to allude to the two assignments.
The auth framework has the following points:
- Clients
- Permission: Binary (yes/no) here; Django uses the flag to determine whether the user has performed any action or not.
- Group: A conventional approach to applying permissions and consents to more than one client.
- A configurable secret key hashing framework.
- Structures and view devices for signing in clients or confining substance.
- A pluggable backend framework.
- Django’s confirmation framework is extremely nonexclusive and doesn’t give a few highlights regularly tracked down in web verification frameworks. Answers for a portion of these normal issues have been carried out in outsider bundles:
- Secret key strength checking.
- Choking of login endeavors.
- Validation against outsiders (OAuth, for instance).
- Object-level authorizations.
The validation framework is adaptable. You can develop your URLs, structures, perspectives, and layouts without any preparation, assuming you like, simply calling the given API to sign in to the client. In any case, in this article, we will utilize Django’s “stock.” Verification perspectives and structures for our login and logout pages. Well, in any case, you have to make a few layouts, yet at the same time, that is quite simple.
Create Use Django Authentication
Let’s see how we can create authentication in Django as follows:
But first, we need to make the virtual environment for our application with the help of the below command as follows.
Code:
mkdir sample_auth
cd sample_auth
python –m venv env
source env/bin/activate
pip install django
We need to create an application inside the project, open the setting .py file, and add the created application to the list.
Code:
INSTALLED_APPS = [
'django.contrib.admin',
'django.contrib.auth',
'django.contrib.contenttypes',
'django.contrib.sessions',
'django.contrib.messages',
'django.contrib.staticfiles',
'sampleproject',
]
Now create the model; if our project is complex, then we need to create a different model inside the project, and it can be handled only by using authentication. So inside the sampleproject, we need to add the model as follows.
Code:
from django.db import models
from django.contrib.auth.models import AbstractUser
Here we need to send the token to Django for mode, so we need to add the following line inside the setting file.
Code:
Student_model= 'sampleproject.student'
After that, we must migrate and register the created model inside the admin dashboard, as shown in the code below.
Code:
from django.contrib.auth.admin import StudentAdmin
from .models import Student
admin.site.register(Student, StudentAdmin)
After that, we must add all the required parameters for the post.
Now the important step is to add authentication.
Now we have applied, and it is running fine; if we already have an account, we can directly log in; otherwise, we need to create an account for Auth0. Now install the required libraries such as python Jose and auth with the help of the below command as follows.
Code:
pip install python-jose social-auth-app-django
In social auth, we have URLs, so that URLs we need to put them inside the URL file of our created application as follows.
Code:
path('', include('socialdjango.urls'))
Now migrate the file and check the setting file; here, we can see the newly added URL below.
Code:
INSTALLED_APPS = [
  'django.contrib.admin',
  'django.contrib.auth',
  'django.contrib.contenttypes',
  'django.contrib.sessions',
  'django.contrib.messages',
  'django.contrib.staticfiles',
  'sampleproject',
  ''socialdjango ']
AUTH_USER_MODEL = 'sampleproject.User'
SOCIAL_AUTH_TRAILING_SLASH = False
SOCIAL_AUTH_AUTH0_DOMAIN = 'specified auth0 domain'
SOCIAL_AUTH_AUTH0_KEY = 'specified required client ID'
SOCIAL_AUTH_AUTH0_SECRET = 'auth0 secret key'
SOCIAL_AUTH_AUTH0_SCOPE = [
  'id',
  'profile',
  'email'
]
Loginurl='login/auth0'
Loginredirectedurl = '/'
Logoutredirectedurl='/'
Explanation:
- So we added auth0; if the user is already logged into the application, we need to show a logout link. This will be handled in HTML pages as below.
Code:
<div class="navbar-end pr-2">
  <div class="navbar-item">
   <div class="buttons">
   <AmpContent>
   <a class="button is-primary" href="/logout/">Click here to Logout</a>
    </AmpContent>
<NonAmpContent>
  <a class="button is-primary" href="/login/auth0">Click here to Login</a>
   </NonAmpContent>
  </div>
 </div>
</div>
Explanation:
- The end results are shown in the below screenshot as follows.

The admin dashboard is shown in the below screenshot as follows.
Django Authentication Web App
First, we need to consider the requirement.
First, we need to confirm the installation of Python 3.8 and Django 3.1. After that, we can build the app as follows.
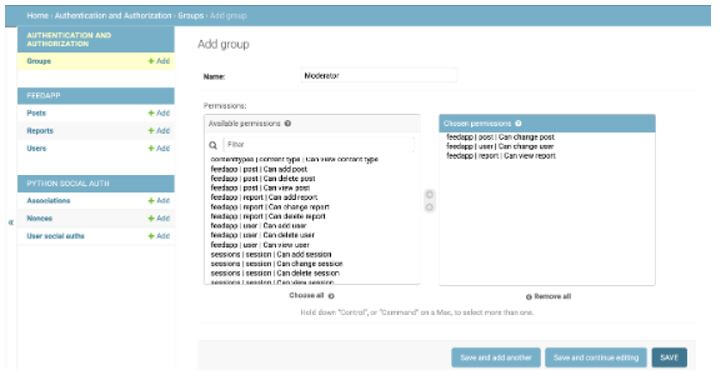
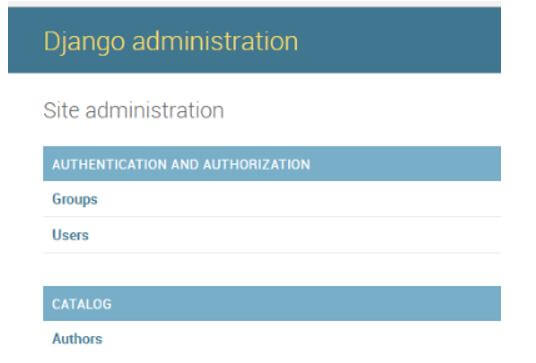
In the above point, we already discussed how to create an application and add authentication; in Django admin, we have a function to add users and groups, as shown in the screenshot below.
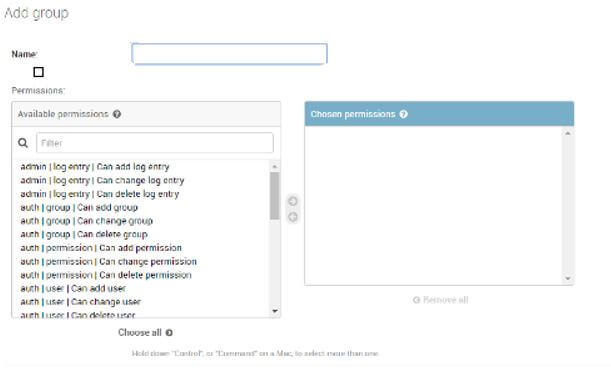
Now suppose we need to add groups, then we need to click on Add button so that we will get a new screen here; put the group name and select the permission that we want to click on the save button as shown below screenshot.
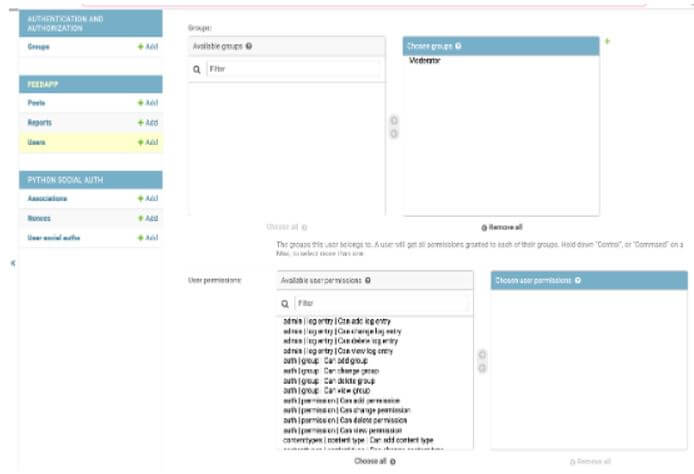
Similarly, we can add users for users; we need to fill in details such as username, password, first name, last name, and email address. Also, we need to select the required permission.
Code:
mkdir sample_auth
cd sample_auth
python –m venv env
source env/bin/activate
pip install django
We need to create an application inside the project, open the setting .py file, and add the created application to the list.
Code:
INSTALLED_APPS = [
  'django.contrib.admin',
  'django.contrib.auth',
  'django.contrib.contenttypes',
  'django.contrib.sessions',
  'django.contrib.messages',
  'django.contrib.staticfiles',
  'sampleproject',
]
Other configurations we already cover in the above points, now we need to render the HTML inside the view.py file as follows.
Code:
from django.shortcuts import render
def index(request):
  return render(request, 'sampleproject/home.html')
def reports(request):
  return render(request, 'sampleproject/about.html')
Now create an html file with the name home and add the following code.
Code:
<!DOCTYPE html>
<html>
<head>
<meta charset="utf-8">
<meta name="viewport" content="width=device-width, initial-scale=1">
<title>specified Title </title>
<link rel="stylesheet" href="link of css file">
</head>
<body style="background-color:powderblue;>
<section class="hero is-info">
<div class="hero-head">
<nav class="navbar" role="navigation" aria-label="main navigation">
<div id="navbarBasicExample" class="navbar-menu">
<div class="navbar-start pl-2">
<a href="/" class="navbar-item">Home</a>
</div>
<div class="navbar-end pr-2">
<div class="navbar-item">
</div>
</div>
</div>
</nav>
<div class="hero-body">
<div class="container has-text-centered">
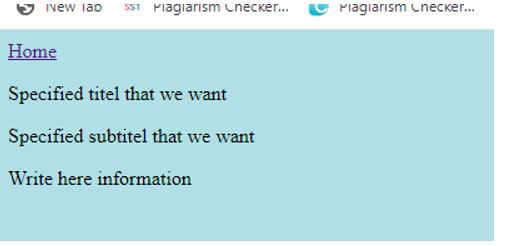
<p class="title">Specified titel that we want</p>
<p class="subtitle">Specified subtitel that we want</p>
</div>
</div>
</div>
</section>
<section class="section">
<div class="container">
Write here information
</div>
</section>
</body>
</html>
Explanation:
- The end result of the above implementation is shown in the below screenshot.
Output:
Add Authentication
Now let’s assume everything is working fine, so we need to add the authentication in our application; if we have already created an account, we can directly integrate; otherwise, we need to create it. Once our auth account is created, we can see create an application on the dashboard; here, we need to assign a name and select a regular application. But here is one more important thing we need to send a request to Django for connection with Auth.
After successfully configuring the user, we need to navigate to the login page, as shown in the screenshot below.

This way, we can create more screens for logout and resetting passwords per our requirements.
Conclusion
With the help of the above article, we saw Django authentication. From this article, we saw basic things about Django authentication and the features and installation of Django authentication, and how we use it in Django authentication.

